Custom Nodes let you create your own reusable Gumloop nodes using AI. Describe what you want in plain language, and Gumloop generates the code for you. Once created, you can save, share, and reuse your custom node across any workflow.
Custom Nodes cost 3 credits per execution and run in an isolated virtual environment with a 5-minute runtime limit.
Custom Nodes allow you to build your own Gumloop nodes, define custom functionality, share with your team, deploy with one click, and integrate with any API or service.
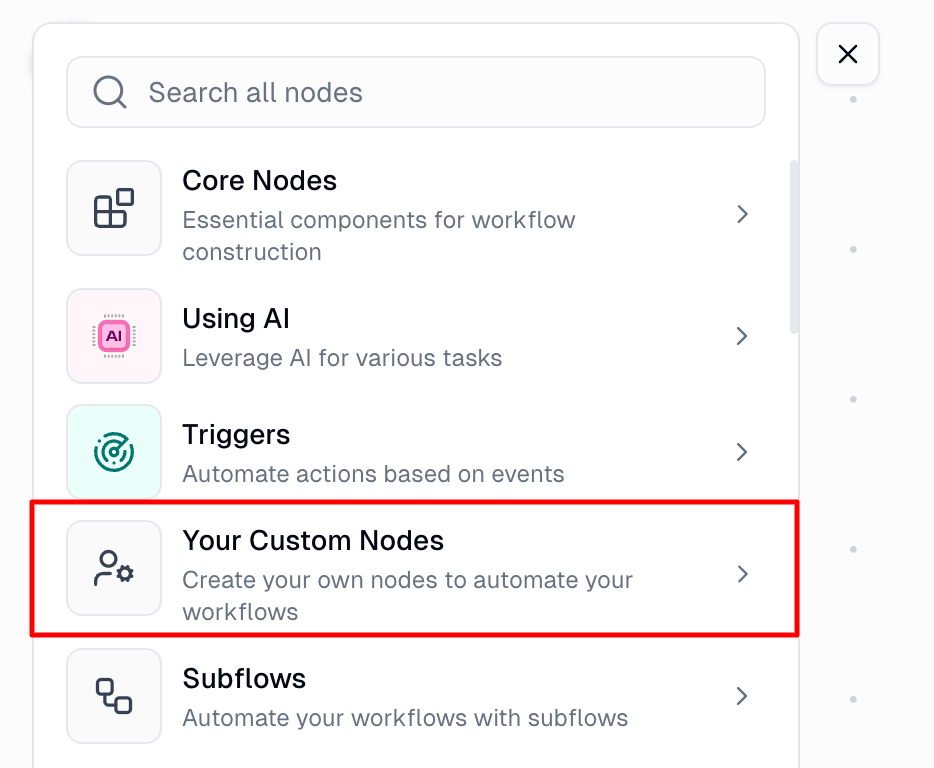
You can find the custom node builder through the node library:Step 1: Open the Node LibraryClick the node library button or press Cmd/Ctrl + B, then select Your Custom Nodes.
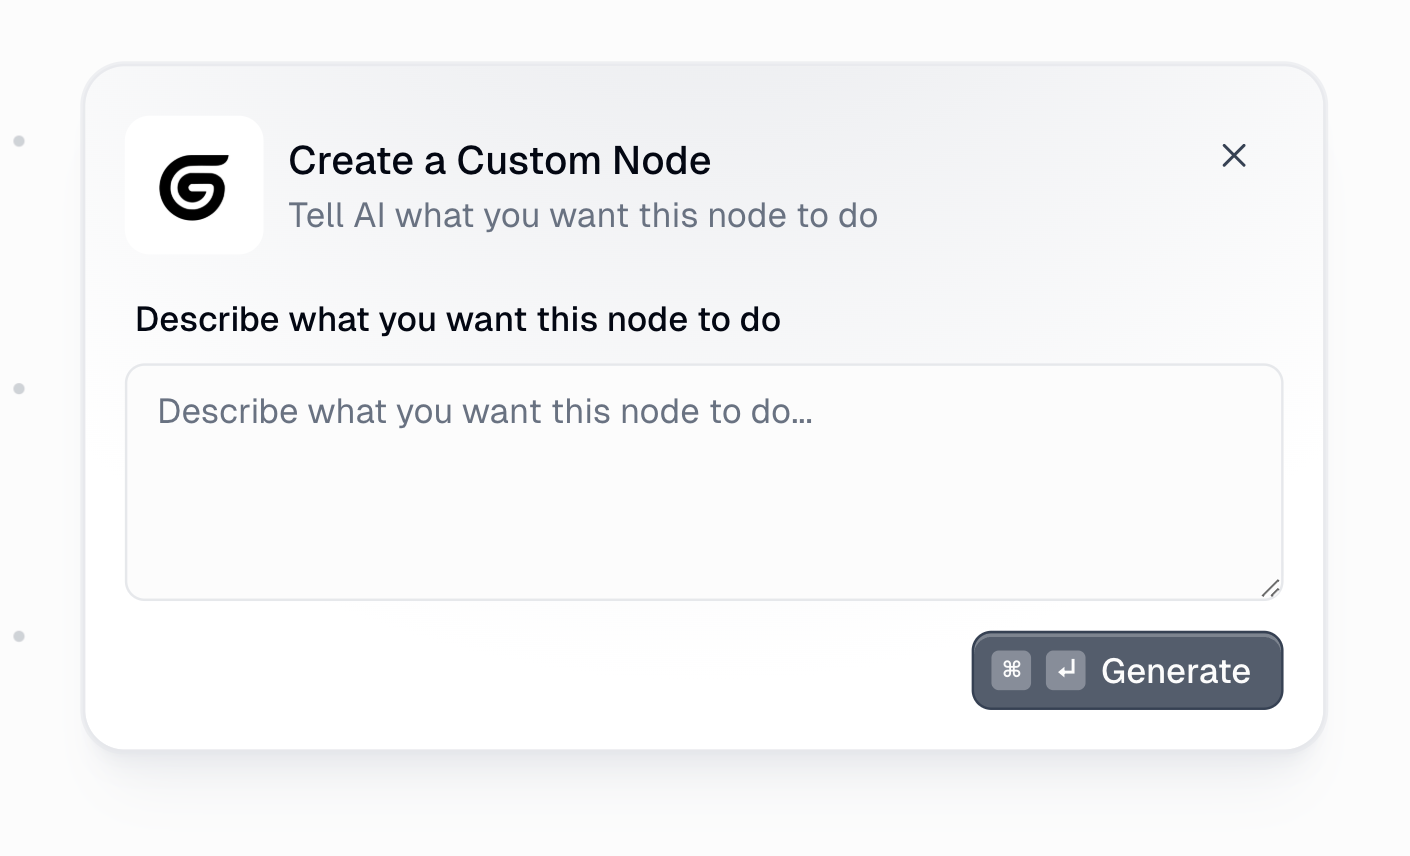
Step 2: Describe Your NodeEnter a clear description of what you want the node to do. Be specific about inputs, outputs, and the transformation logic.
Step 3: Generate and TestClick Generate and Gumloop’s AI will create the node for you. Test it with sample data before saving.
Custom nodes can be shared with teammates and collaborators. By default, only the creator can edit a custom node, but you can grant editing permissions to others.
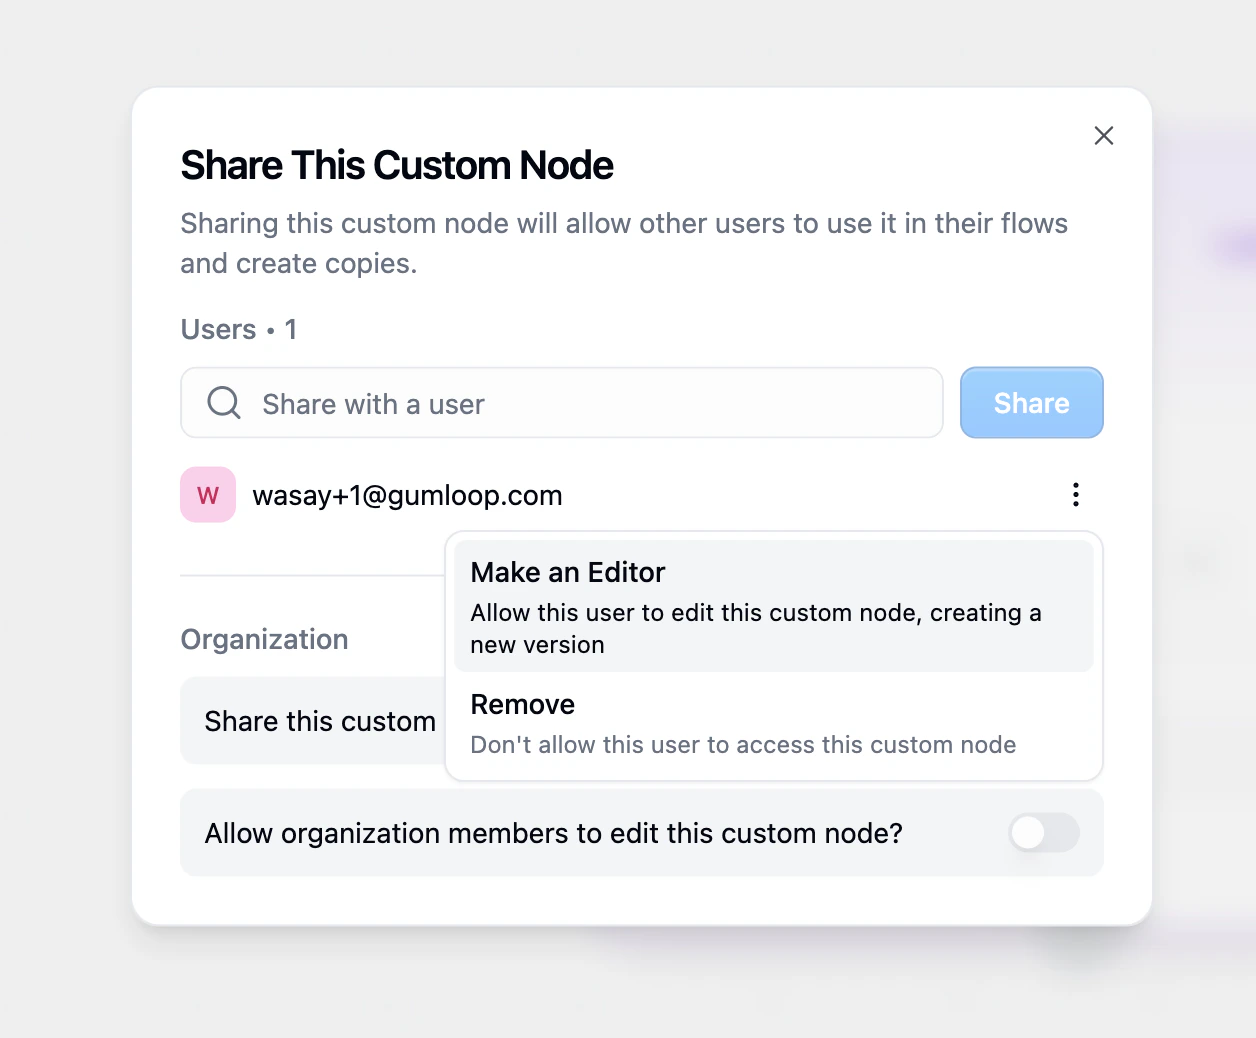
Step 1: Open the Share DialogHover over the custom node and click the Share button.
Step 2: Add Users and Grant Editor AccessEnter the user’s email to share access to the node. To give them editing permissions, click the three dots next to their name and select Make an Editor.
Custom nodes often need to access sensitive data like API keys, tokens, or credentials. Gumloop provides a secure secrets management system that lets you store encrypted secrets and use them in your custom nodes without exposing them in your code or logs.
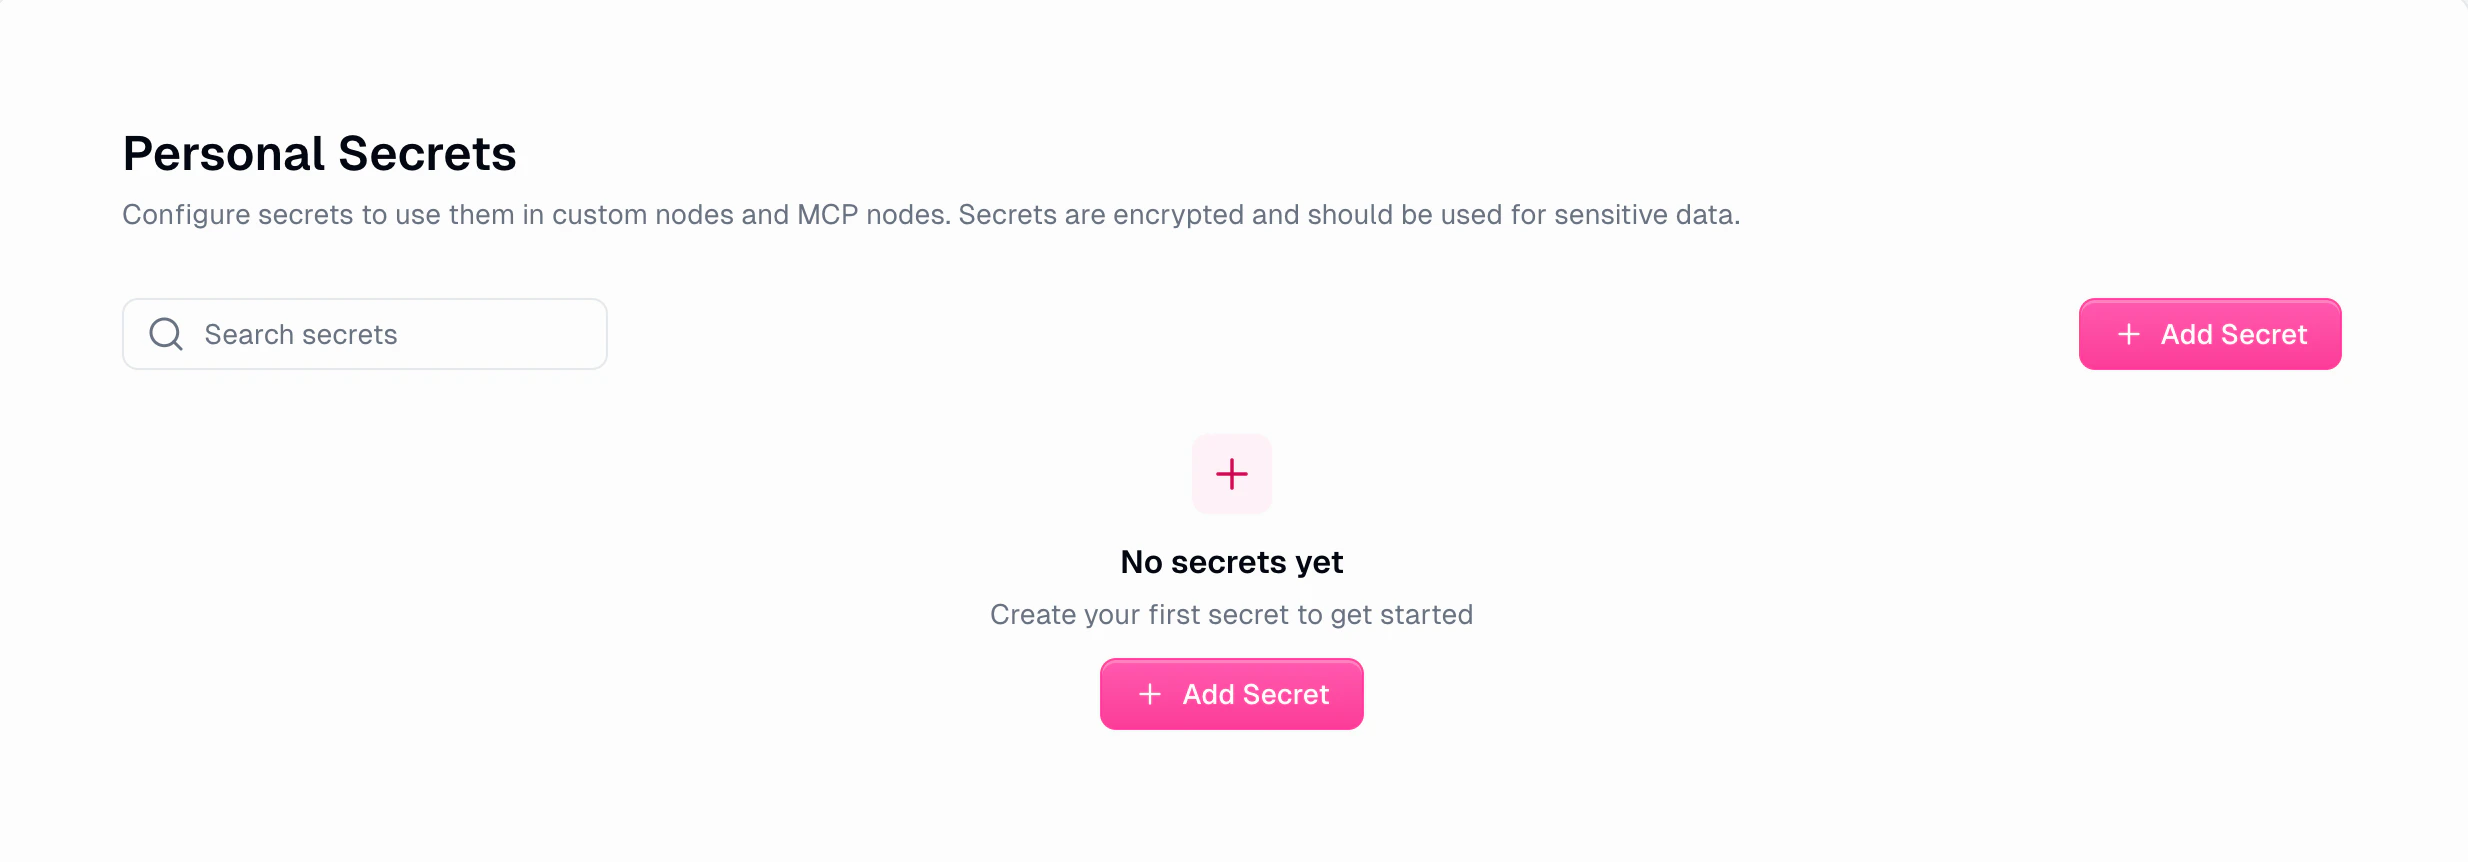
Before using secrets in a custom node, you need to create them in your Personal Secrets settings:Step 1: Navigate to Personal SecretsGo to Settings > Profile > Secrets or visit gumloop.com/settings/profile/secrets.
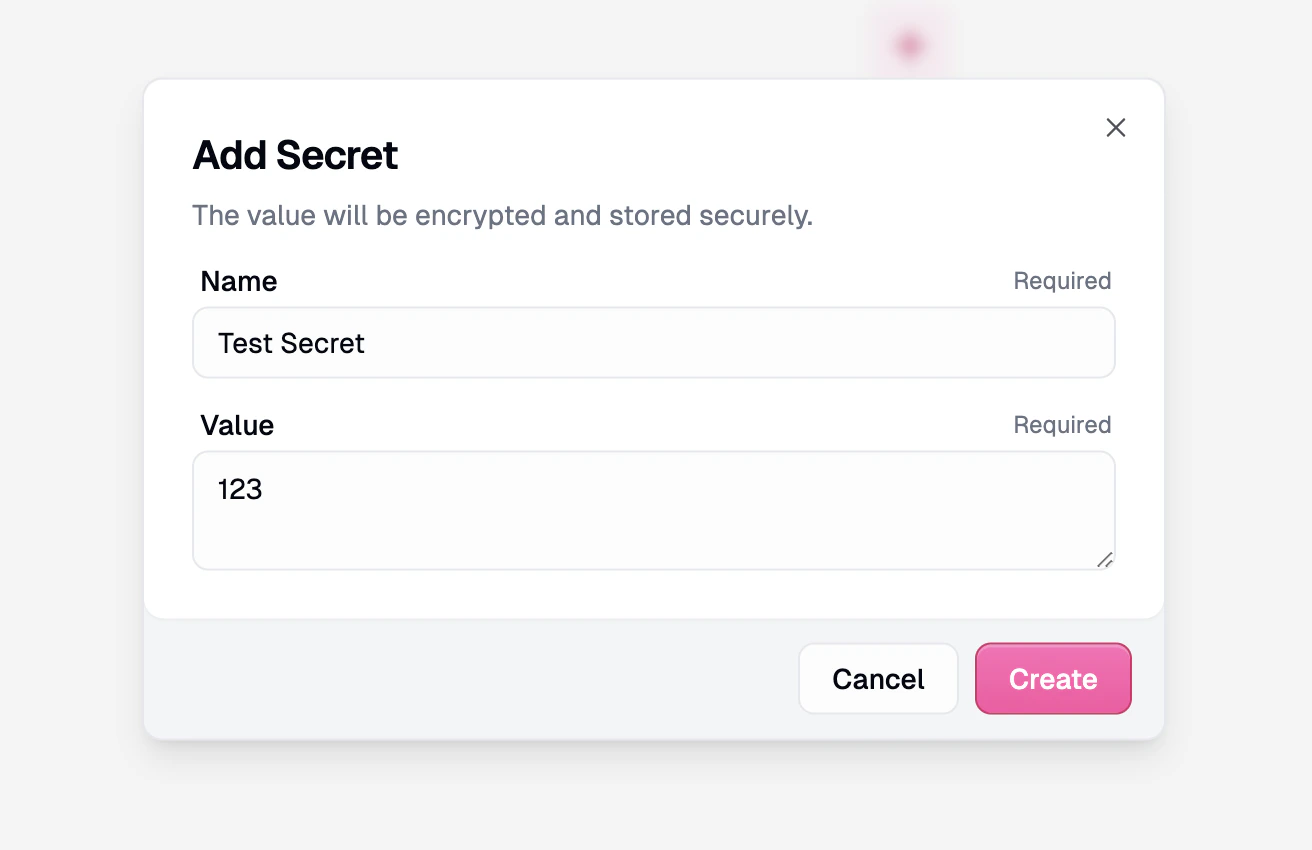
Step 2: Add a New SecretClick + Add Secret to open the creation dialog. Enter a descriptive name for your secret (this is how you’ll reference it later) and the secret value. The value will be encrypted and stored securely.
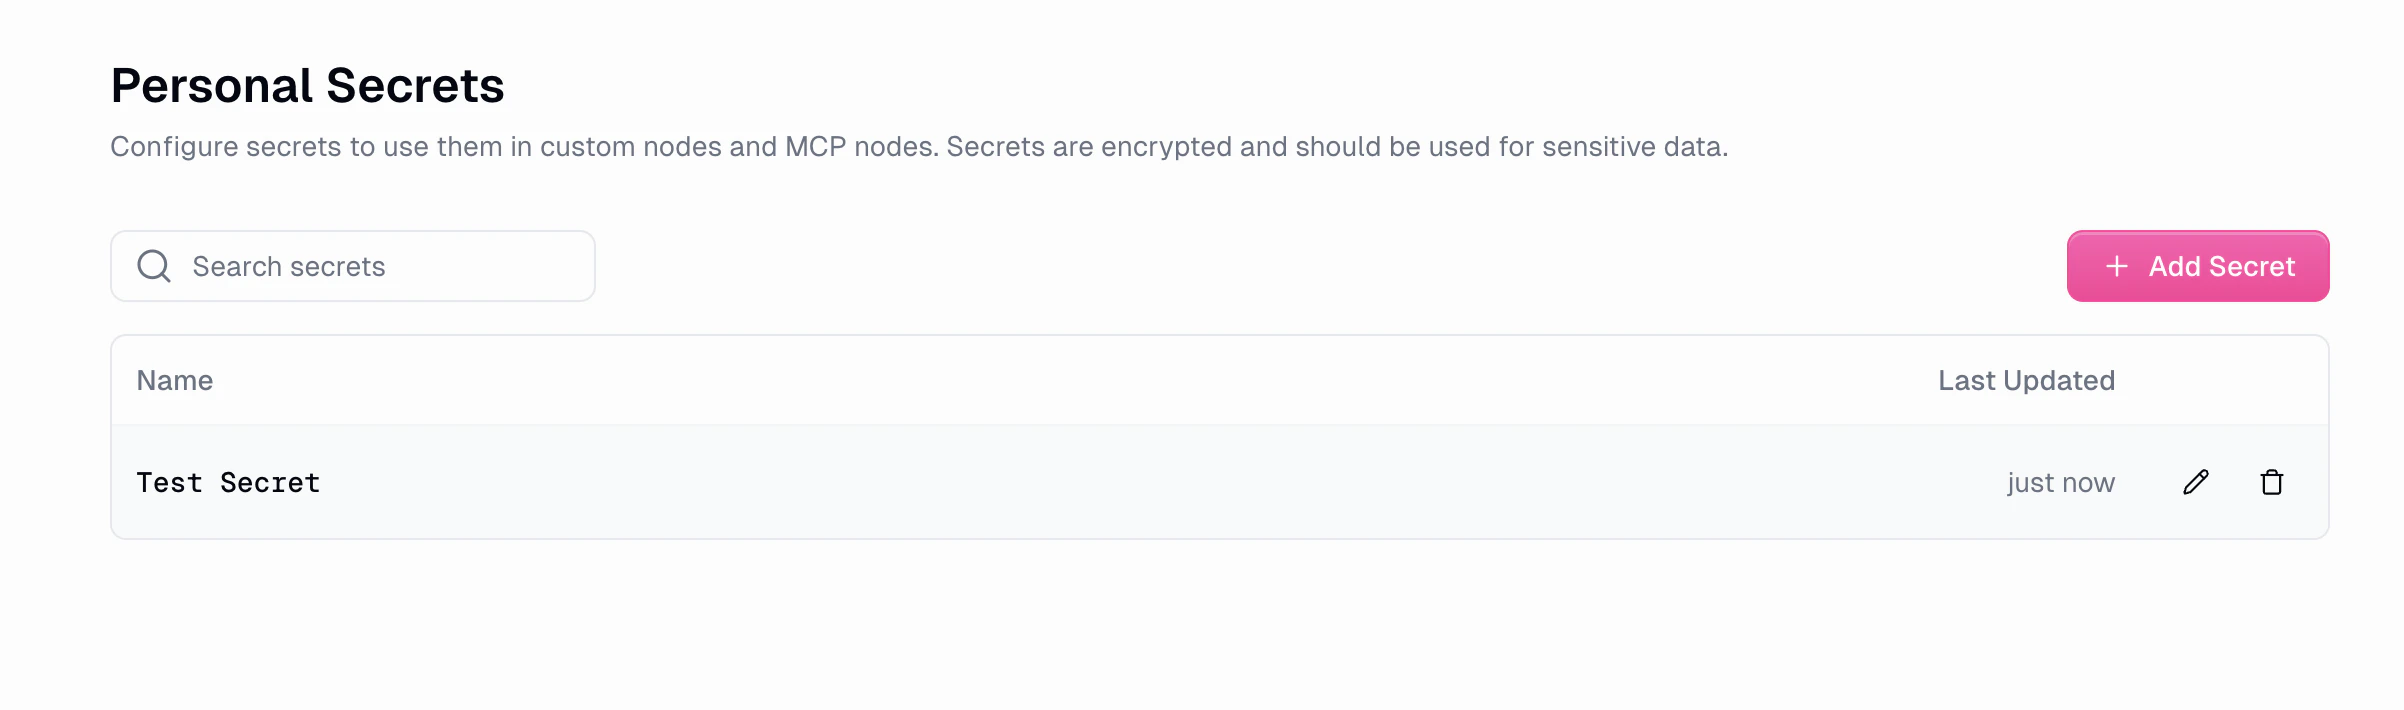
Step 3: Manage Your SecretsYour secrets appear in a list showing the name and last updated time. You can edit or delete secrets as needed. Note that secret values are never displayed after creation for security.
When you describe a custom node that needs API credentials or sensitive data, Gumloop’s AI automatically generates code that accesses these values through environment variables using os.getenv() or os.environ.get(). This keeps your secrets out of the code itself.
Here are some example prompts that demonstrate how to request secrets in your custom nodes:Example 1: API Integration with Authentication
Create a node that makes a REST API call to any endpoint.Accept parameters for: API endpoint URL, request method (GET/POST/PUT/DELETE), and request body.Use an API key from an environment variable for authentication in the Authorization header.Return the API response and status code.
Example 2: Database Connection
Create a node that connects to a PostgreSQL database and runs a query.Use environment variables for the database connection string and credentials.Accept a SQL query as input and return the results as a list.
Example 3: Third-Party Service Integration
Create a node that sends SMS messages using Twilio.Use environment variables for the Twilio Account SID and Auth Token.Accept phone number and message text as inputs.Return the message SID on success.
When you use a prompt like Example 1 above, the AI generates code that retrieves secrets from environment variables. Here’s what the generated code looks like:
The code uses os.getenv() to retrieve the secret value at runtime:
import osimport requests# Retrieve API key from environment variableapi_key: str | None = os.getenv('TEST_SECRET_API_KEY')if not api_key: return _error('Missing TEST_SECRET_API_KEY environment variable', 401)# Use the API key in the Authorization headerheaders: dict[str, str] = {'Authorization': f'Bearer {api_key}'}# Make the API requestresponse = requests.get(endpoint_url, headers=headers)
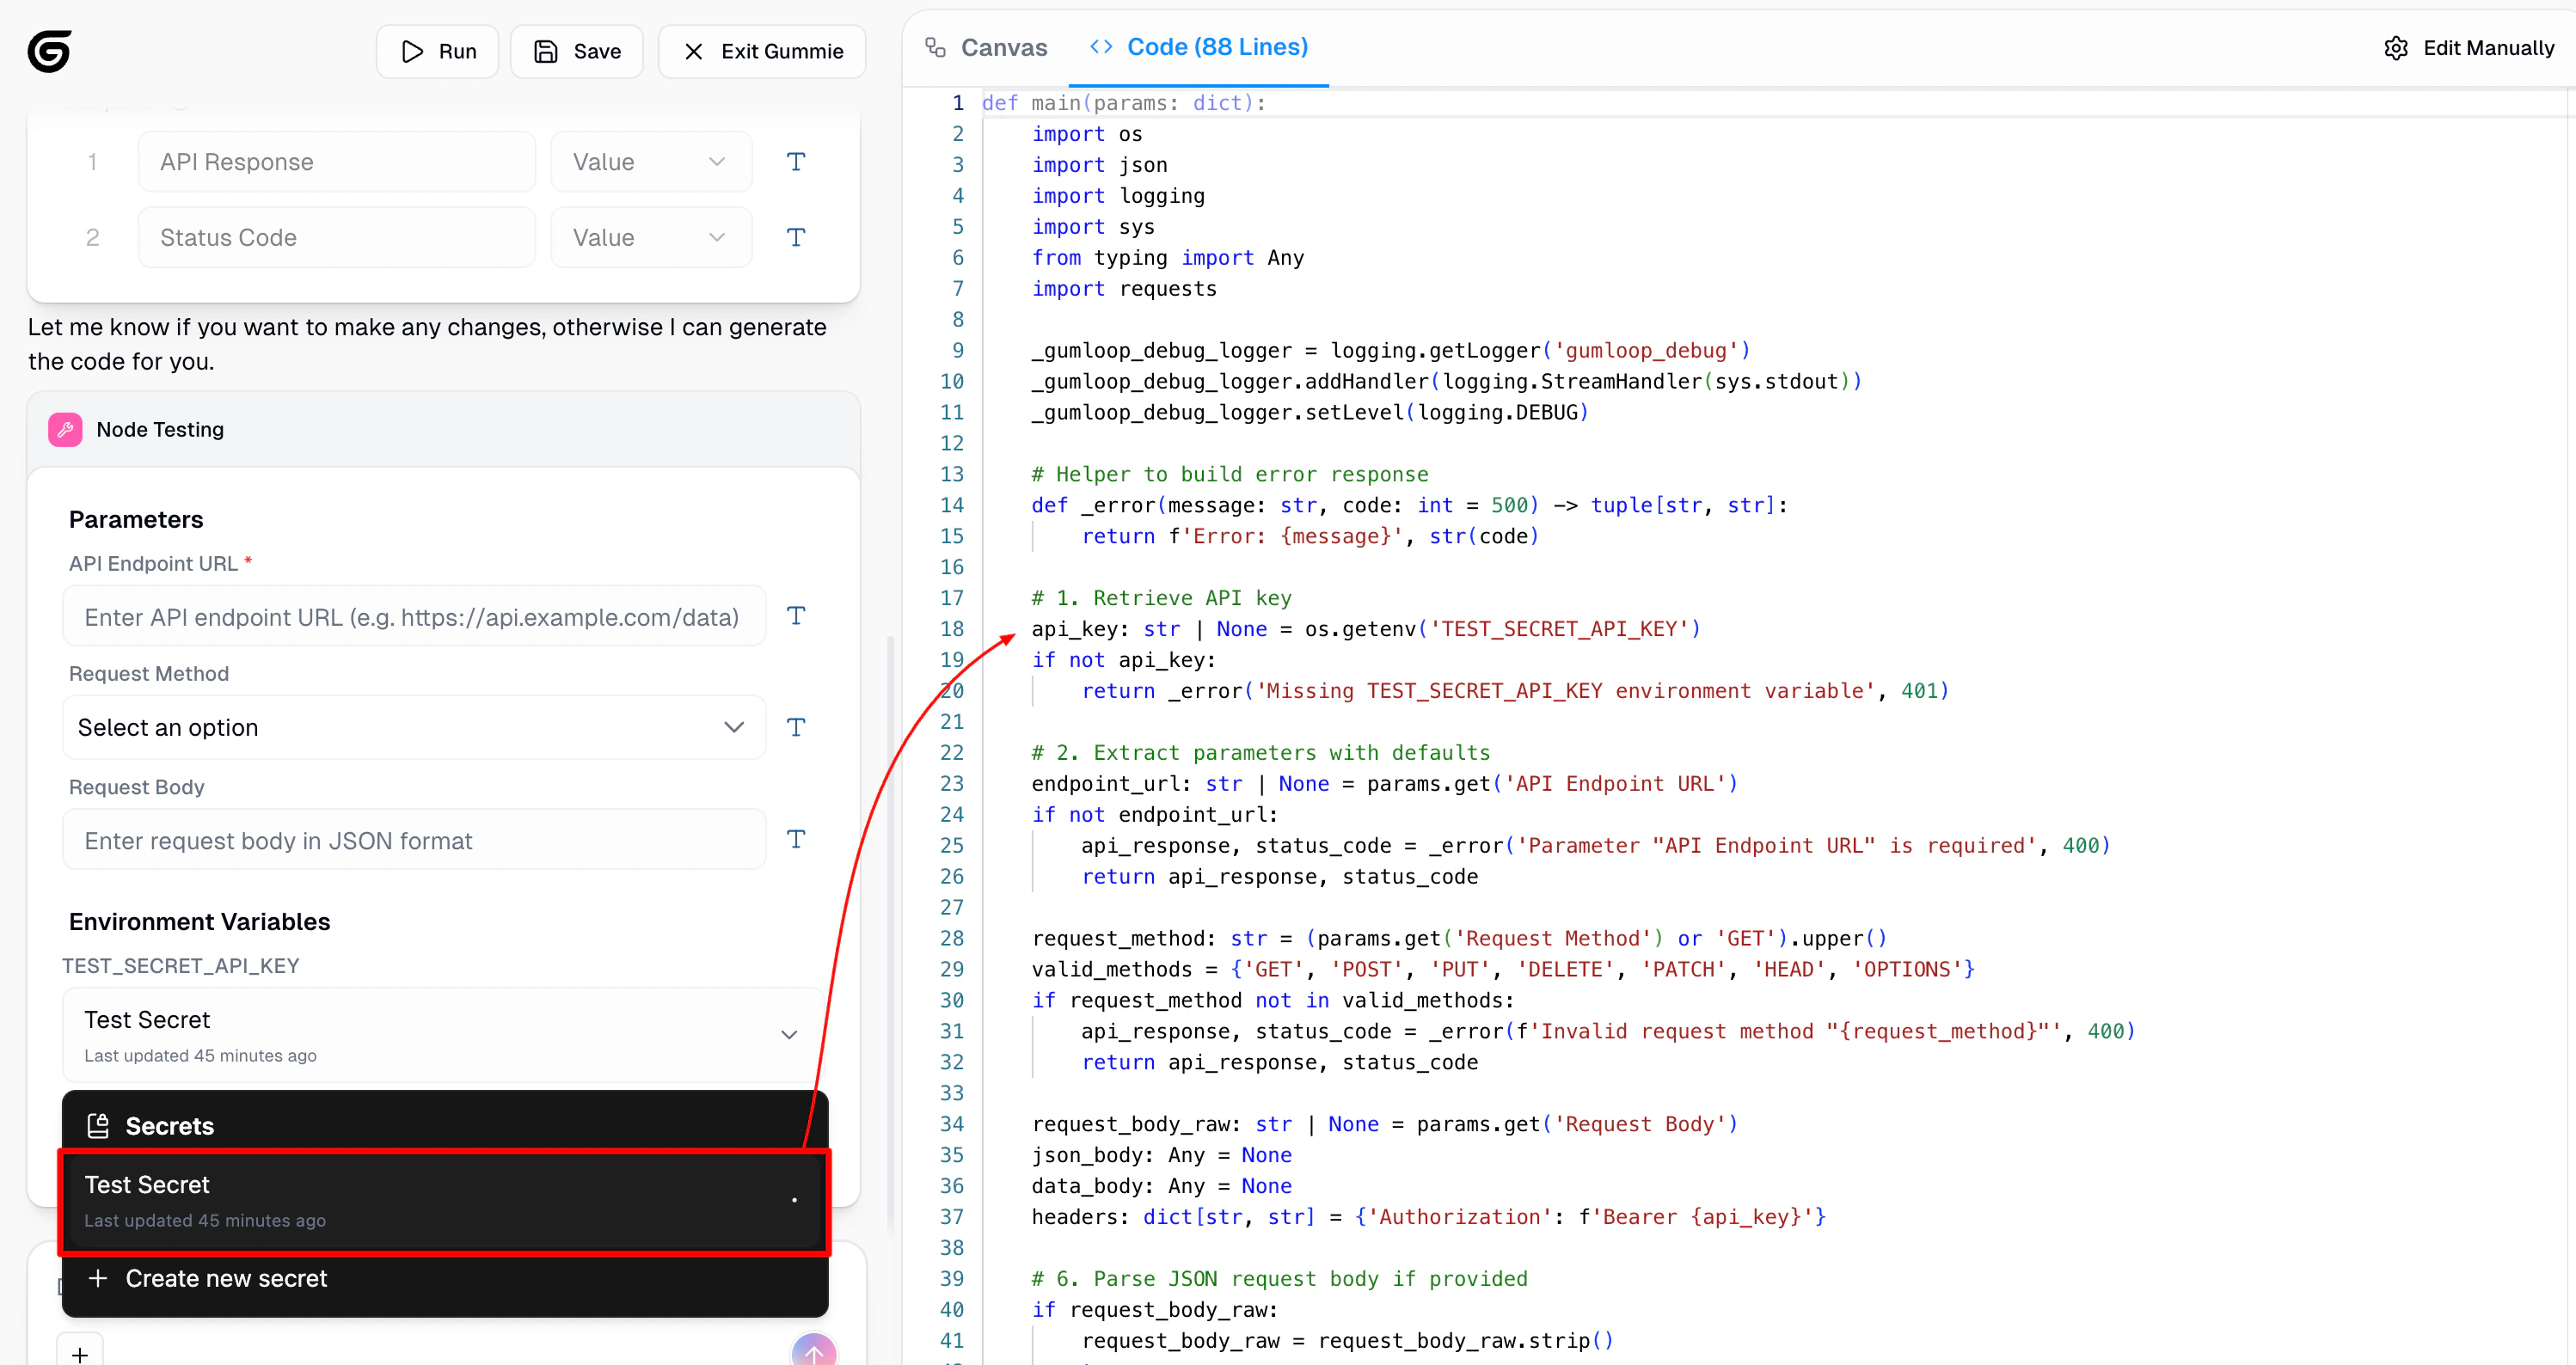
After creating a custom node that requires environment variables, you’ll see an Environment Variables section in the node’s configuration panel. This is where you map your stored secrets to the variables the code expects.
How to map secrets:
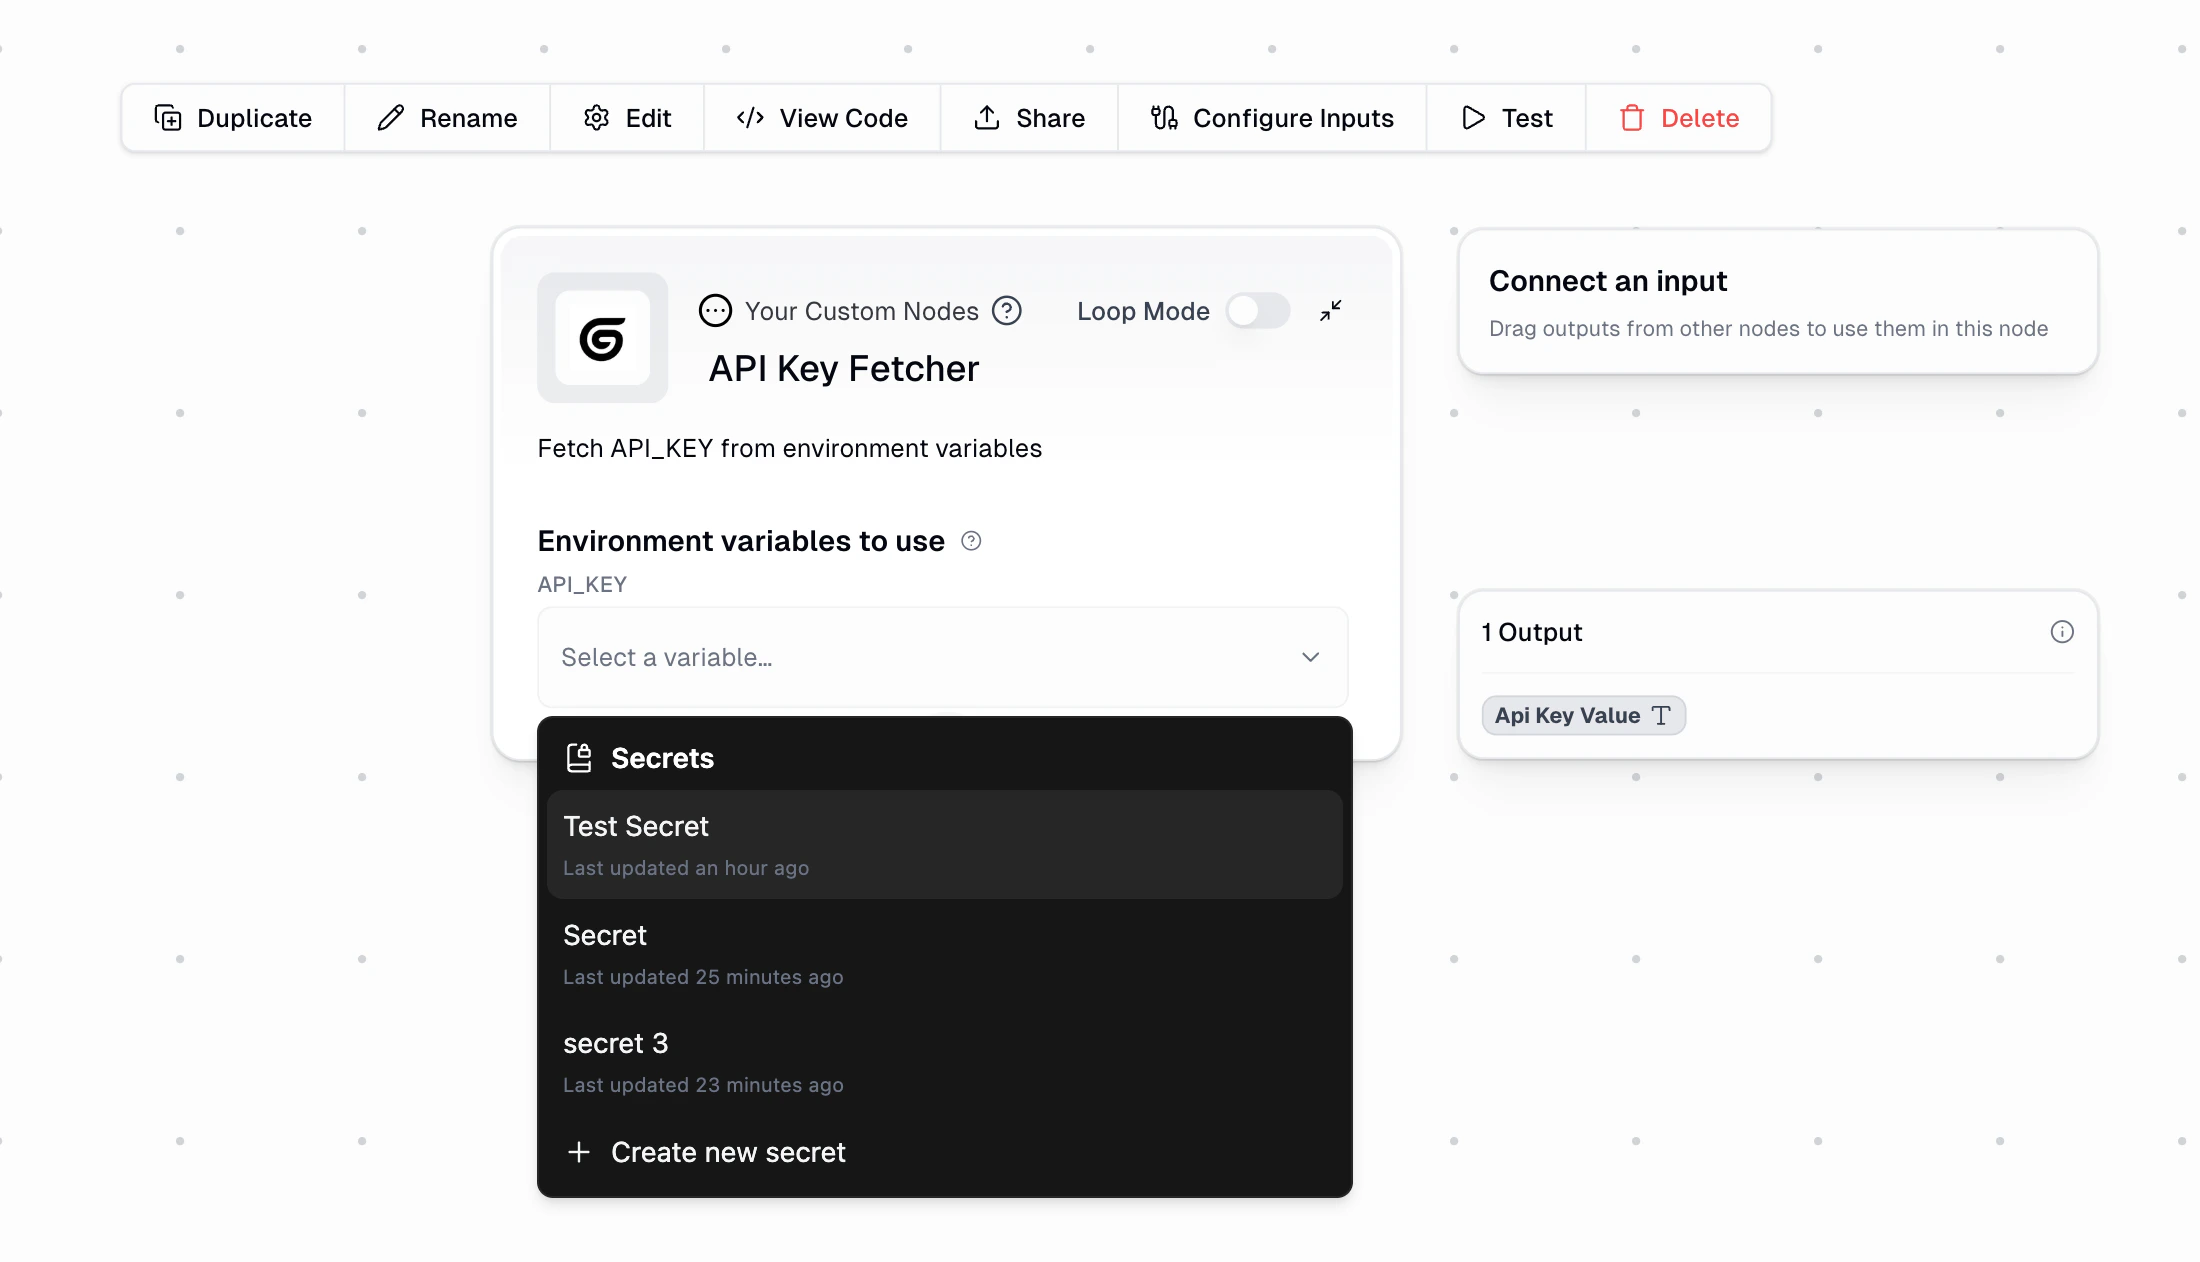
Locate the Environment Variables Section: When you add a custom node to your workflow that requires environment variables, you’ll see a picker for each required variable in the node’s settings panel on the left side.
Select Your Secret: Click the dropdown to see all secrets you’ve created in your Personal Secrets settings. Select the appropriate secret for each environment variable.
Add New Secrets Inline: If you haven’t created the required secret yet, click + Create new secret at the bottom of the dropdown to add a new secret without leaving the workflow builder.
Naming convention: Use descriptive, uppercase names with underscores for your secrets (e.g., OPENAI_API_KEY, STRIPE_SECRET_KEY, MY_SERVICE_TOKEN). This makes it clear what each secret is for and matches common environment variable conventions.
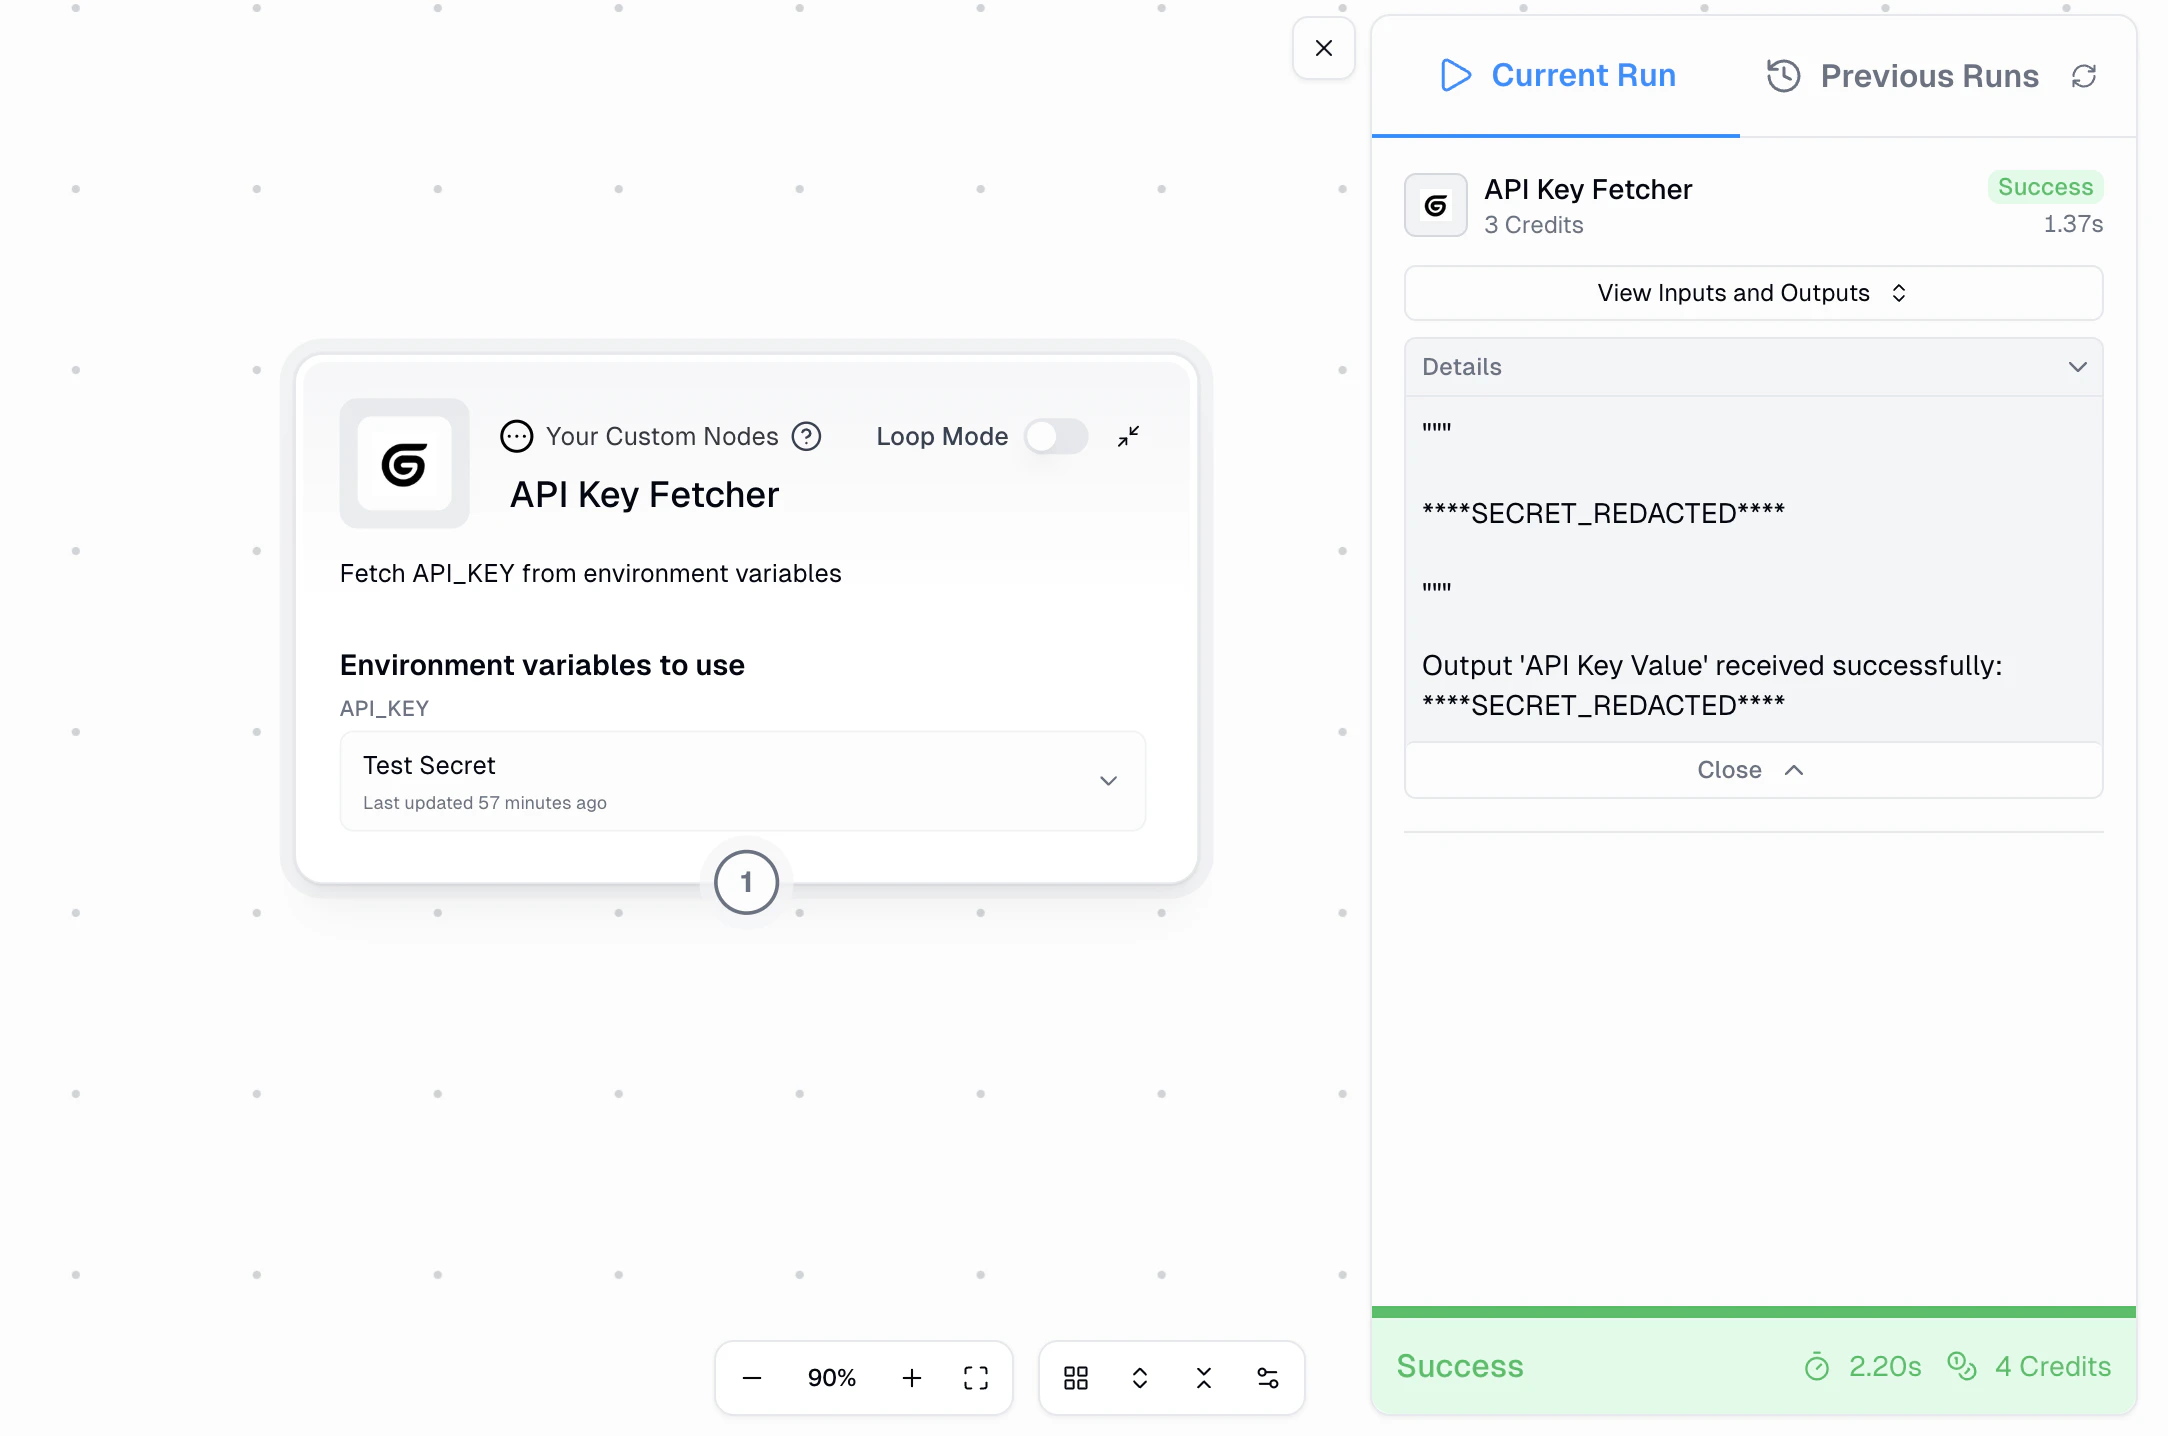
If your custom node accidentally prints or returns a secret value, Gumloop automatically replaces it with ****SECRET_REDACTED**** in all logs and outputs. This prevents accidental exposure of sensitive data.
In the example above, you can see that even though the custom node outputs the secret value, it appears as ****SECRET_REDACTED**** in the run output. This redaction happens automatically for all secrets you’ve configured.
While automatic redaction protects against accidental exposure, it may make debugging harder. Avoid logging or printing sensitive values in your custom node code—instead, log descriptive messages about what your code is doing without including the actual secret values.
Custom node secrets are different from the credential connections you see on integration nodes (like Gmail or Slack):
Aspect
Personal Secrets
Node Credentials
Purpose
API keys and tokens for custom code
OAuth connections to services
Setup
Manual entry in Settings
OAuth flow through Gumloop
Scope
Custom nodes and MCP nodes
Specific integration nodes
Management
Settings > Profile > Secrets
Per-node credential selector
Use Personal Secrets when you’re writing custom code that needs to authenticate with an API. Use Node Credentials when you’re using Gumloop’s built-in integration nodes.